Reactive MVVM Data Binding Practice with RxSwift (or Combine) : Single-Method Interface
One of the cool practices I learned from my last job at Grindr was definitely how to make the best use of RxSwift to bind a view model to a view controller with dynamic properties and events.
In this article, I will focus on RxSwift first. Links to Combine equivalent code snippets will be provided too. Topics cover:
- Single-method view model binding; pros and cons
- Unit test the view model
- Bind table/collection data sources
Starts With An Example
Suppose we have a view controller that simply changes the background color when the user taps the button:
import UIKit

class SimpleViewController: UIViewController {
  enum Color: CaseIterable {
    case red, blue, purple
    var uiColor: UIColor {
      switch self {
      case .red: return .red
      case .blue: return .blue
      case .purple: return .purple
      }
    }
  }

  private let colors = Color.allCases

  private var currentColorIndex = 0
  private var currentColor: Color { colors[currentColorIndex] }

  private var nextColorIndex: Int { (currentColorIndex + 1) % colors.count }
  private var nextColor: Color { colors[nextColorIndex] }

  private let button = UIButton()
  override func viewDidLoad() {
    super.viewDidLoad()

    // Install the button
    view.addSubview(button)
    button.frame = UIScreen.main.bounds
    button.addTarget(self, action: #selector(buttonDidTap), for: .touchUpInside)

    // Initialize the bg color and the button title
    view.backgroundColor = currentColor.uiColor
    button.setTitle("Change to \(nextColor)", for: .normal)
  }

  @objc private func buttonDidTap() {
    // Advance the color index
    currentColorIndex = nextColorIndex

    // Change the bg color and the button title
    view.backgroundColor = currentColor.uiColor
    button.setTitle("Change to \(nextColor)", for: .normal)
  }
}
Technically, it’s better to isolate the business logic from the view controller. Let’s create a view model and make the view controller purely react to what the view model asks for.
View Model: Single-Method Binding Pattern
The view controller needs to bind the view model, for which we create the protocol to enforce the single-method binding pattern:
protocol ViewModelBinding {
    associatedtype Inputs
    associatedtype Outputs

    func bind(_ inputs: Inputs) -> Outputs
}
As the background color and button title keep changing in response to the button taps, this is a great scenario where RxSwift can get involved —an event driven solution. (However, if you are more interested in the Combine-version, please check out here.)
import RxCocoa // To allow Driver and Signal
import RxSwift

class SimpleViewModel: ViewModelBinding {
  enum Color: CaseIterable {
    case red, blue, purple
  }

  struct Input {
    let buttonTap: Observable<Void>
  }

  struct Output {
    let backgroundColor: Driver<Color>
    let buttonTitle: Driver<String>
    let disposable: Disposable
  }

  func bind(_ input: Input) -> Output {
    let colors: Driver<[Color]> = .just(Color.allCases)
    let currentColorIndexRelay = BehaviorRelay<Int>(value: 0)

    let currentColor: Driver<Color> = Driver
        .combineLatest(colors, currentColorIndexRelay.asDriver())
        .map { colors, currentColorIndex in colors[currentColorIndex] }

    let nextColorIndex: Driver<Int> = Driver
        .combineLatest(colors, currentColorIndexRelay.asDriver())
        .map { colors, currentColorIndex in (currentColorIndex + 1) % colors.count }

    let nextColor: Driver<Color> = Driver
        .combineLatest(colors, nextColorIndex)
        .map { colors, nextColorIndex in colors[nextColorIndex] }

    // Form the output event streams for the binder to subscribe
    return Output(
      backgroundColor: currentColor,
      buttonTitle: nextColor.map { "Change to \($0)" },
      disposable: input.buttonTap.withLatestFrom(nextColorIndex).bind(to: currentColorIndexRelay)
    )
  }
}
import RxCocoa // To allow Reactive extensions such as button.rx.tap
import RxSwift
import UIKit
class SimpleViewController: UIViewController {
private let viewModel = SimpleViewModel()
private var disposeBag = DisposeBag()
private let button = UIButton()
override func viewDidLoad() {
super.viewDidLoad()
// Install the button
view.addSubview(button)
button.frame = UIScreen.main.bounds
// Bind the input to the view model
let input = SimpleViewModel.Input(
buttonTap: button.rx.tap.asObservable()
)
let output = viewModel.bind(input)
// Bind the output from the view model
output.backgroundColor
.map { $0.uiColor }
.drive(with: view, onNext: { view, bgColor in view.backgroundColor = bgColor }) // or simply .drive(view.rx.backgroundColor)
.disposed(by: disposeBag)
output.buttonTitle
.drive(with: button, onNext: { button, btnTitle in button.setTitle(btnTitle, for: .normal) }) // or simply .drive(button.rx.title(for: .normal))
.disposed(by: disposeBag)
output.disposable
.disposed(by: disposeBag)
}
}
extension SimpleViewModel.Color {
var uiColor: UIColor {
switch self {
case .red: return .red
case .blue: return .blue
case .purple: return .purple
}
}
}You may notice a bunch of interesting points in this binding pattern:
- Input Generates Output: The view model is fully in charge of the business logic according to the input given by the binder, and returns the corresponding output fairly.
- Read-only Data Streams: The event streams in the input and the output are Observables, which are read-only, but not Relays or Subjects that allow their subscribers to send events. This keeps the data flows one-way and debug-friendly.
- Single Binding Interface: There is one and only exposed method
func bind(_: Input) -> Outputin the view model — clear and clean. There can’t be too diverse binding variants but one: create the input, call the method, and get the output. - View Controller As Observer: The view controller does nothing but listen to the view model output. The output are derived from the input originated from the view controller. View controller does not own any business logic, which means you are able apply the same view model to different view controllers, particularly useful when upgrading UI without altering the business functions.
In addition, thanks to RxSwift, interactions between the view model and the view controller are achieved gracefully:
- Dynamic Properties: View properties are updated every time when there is a new event from the Observable in the view model output.
- Responsive Events: User actions from the view, such as taps, are made input to the view model and allow the view model to react.
- Main-Thread Safety: Output like
Driver(stateful) orSignal(stateless) are dispatched to the main thread. Incredibly useful when we bind the output to the view controller without worrying about the wrong thread. The input, on the other hand, can be justObservable. (In Combine, both input and output areAnyPublisher’s; use.subscribe(on: DispatchQueue.main)to ensure the output to run on the main thread.)
Unit Test The View Model
Such an isolated view model allows us to unit test it without the dependency on the view controller, i.e. UIKit. We can easily test the input and output with RxTest providing some fake events: (if you are more into the Combine-version, please check out here with the use of Entwine)
@testable import SimpleProject
import RxSwift
import RxTest
import XCTest

class SimpleViewModelTests: XCTestCase {
  func test_binding() {
    let scheduler = TestScheduler(initialClock: .zero)

    // Create input
    let buttonTap = scheduler.createColdObservable([
        .next(1, ()), .next(2, ()), .next(3, ()),
    ]).asObservable()

    // Create output observers
    let backgroundColorObserver = scheduler.createObserver(SimpleViewModel.Color.self)
    let buttonTitleObserver = scheduler.createObserver(String.self)

    // Bind the input to the view model
    let viewModel = SimpleViewModel()
    let input = SimpleViewModel.Input(
       buttonTap: buttonTap
    )
    let output = viewModel.bind(input)

    // Bind the output from the view model
    let disposeBag = DisposeBag()
    output.backgroundColor.drive(backgroundColorObserver).disposed(by: disposeBag)
    output.buttonTitle.drive(buttonTitleObserver).disposed(by: disposeBag)
    output.disposable.disposed(by: disposeBag)

    // Start testing
    scheduler.start()
    XCTAssertEqual(backgroundColorObserver.events, [
      .next(0, .red),
      .next(1, .blue),
      .next(2, .purple),
      .next(3, .red),
    ])
    XCTAssertEqual(buttonTitleObserver.events, [
      .next(0, "Change to blue"),
      .next(1, "Change to purple"),
      .next(2, "Change to red"),
      .next(3, "Change to blue"),
    ])
  }
}
Data Source Binding
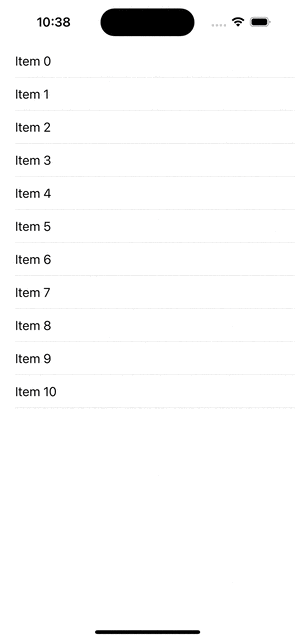
One challenge of this pattern is to bind the data source of a table view or a collection view. One might be used to the Apple’s native delegate pattern and couldn’t imagine how the event-based solution works.
Thankfully, the framework RxDataSources has been brought up to save this case, making the event-driven data source possible. Here is an example: (find the Combine version here with the use of CombineDataSources)
import RxCocoa
import RxSwift

class SimpleTableViewModel: ViewModelBinding {
  struct Input {
    let fetchItems: Observable<Void>
    let selectItem: Observable<Int>
  }

  struct Output {
    let items: Driver<[Int]>
    let showItemContent: Signal<String>
    let disposable: Disposable
  }

  func bind(_ input: Input) -> Output {
    let itemsRelay = BehaviorRelay<[Int]>(value: [])

    let bindFetchItems = input.fetchItems
      .flatMap { [itemService] in itemService.fetchItems() }
      .bind(to: itemsRelay)

    let showItemContentRelay = PublishRelay<String>()

    let bindSelectItem = input.selectItem
      .flatMap { [itemService] item in itemService.fetchItemContent(item) }
      .bind(to: showItemContentRelay)

    // Form the output event streams for the binder to subscribe
    return Output(
      items: itemsRelay.asDriver(),
      showItemContent: showItemContentRelay.asSignal(),
      disposable: Disposables.create(bindFetchItems, bindSelectItem)
    )
  }

  private let itemService = ItemService()
}

class ItemService {
  func fetchItems() -> Single<[Int]> {
    Single.just(Array(0...10))
  }

  func fetchItemContent(_ item: Int) -> Single<String> {
    Single.just("Content of \(item)")
  }
}
import RxCocoa // To allow Reactive extensions such as button.rx.tap
import RxDataSources // To allow the event-driven data source of the table view
import RxSwift
import UIKit
class SimpleTableViewController: UITableViewController {
private let viewModel = SimpleTableViewModel()
private var disposeBag = DisposeBag()
typealias Section = SectionModel<String, Int>
override func viewDidLoad() {
super.viewDidLoad()
// Create table data source
tableView.register(UITableViewCell.self, forCellReuseIdentifier: "Cell")
let tableDataSource = RxTableViewSectionedReloadDataSource<Section> { dataSource, tableView, indexPath, item in
let cell = tableView.dequeueReusableCell(withIdentifier: "Cell", for: indexPath)
cell.textLabel?.text = "Item \(item)"
return cell
}
tableView.delegate = nil
tableView.dataSource = nil
// Bind the input to the view model
let input = SimpleTableViewModel.Input(
fetchItems: .just(()),
selectItem: tableView.rx.modelSelected(Int.self).asObservable()
)
let output = viewModel.bind(input)
// Bind the output from the view model
output.items
.map { [Section(model: "items", items: $0)] }
.drive(tableView.rx.items(dataSource: tableDataSource))
.disposed(by: disposeBag)
output.showItemContent
.map { content in UIAlertController(content: content) }
.emit(with: self, onNext: { vc, alert in vc.present(alert, animated: true) })
.disposed(by: disposeBag)
output.disposable
.disposed(by: disposeBag)
}
}
extension UIAlertController {
convenience init(content: String) {
self.init(title: content, message: nil, preferredStyle: .alert)
addAction(UIAlertAction(title: "OK", style: .default))
}
}
You are able to run the whole examples in the repository, where you can switch the branch to check out the RxSwift and Combine implementations.
Conclusion
In short, this binding pattern beautifully makes the business logic isolated and intuitive. The single exposed binding method prevents too many variants, which implies an aligned coding style. The event-driven solution of RxSwift (or Combine) realizes the dynamic properties and events, gracefully fitting the binding pattern. Finally, the overall pattern makes the unit test maintainable, readable, and perfectly clear.
Hopefully this cool coding pattern can be applied to your projects and excite you about starting to master reactive programming! Give me a clap if it does :-)